Journey Sessions
Create, share, and review verification sessions directly from the back office
The back office lets you create and send journey sessions without any API integration — directly from your browser. This is perfect for in-person onboarding, phone-based verification, or testing a journey before embedding it in your app.
Creating a session
From the left sidebar, go to Analysis → By session, then click "New session" (or use the button visible in the session list).
You'll land on the session creation page. Choose the journey you want to send from the "Choose a journey" dropdown.
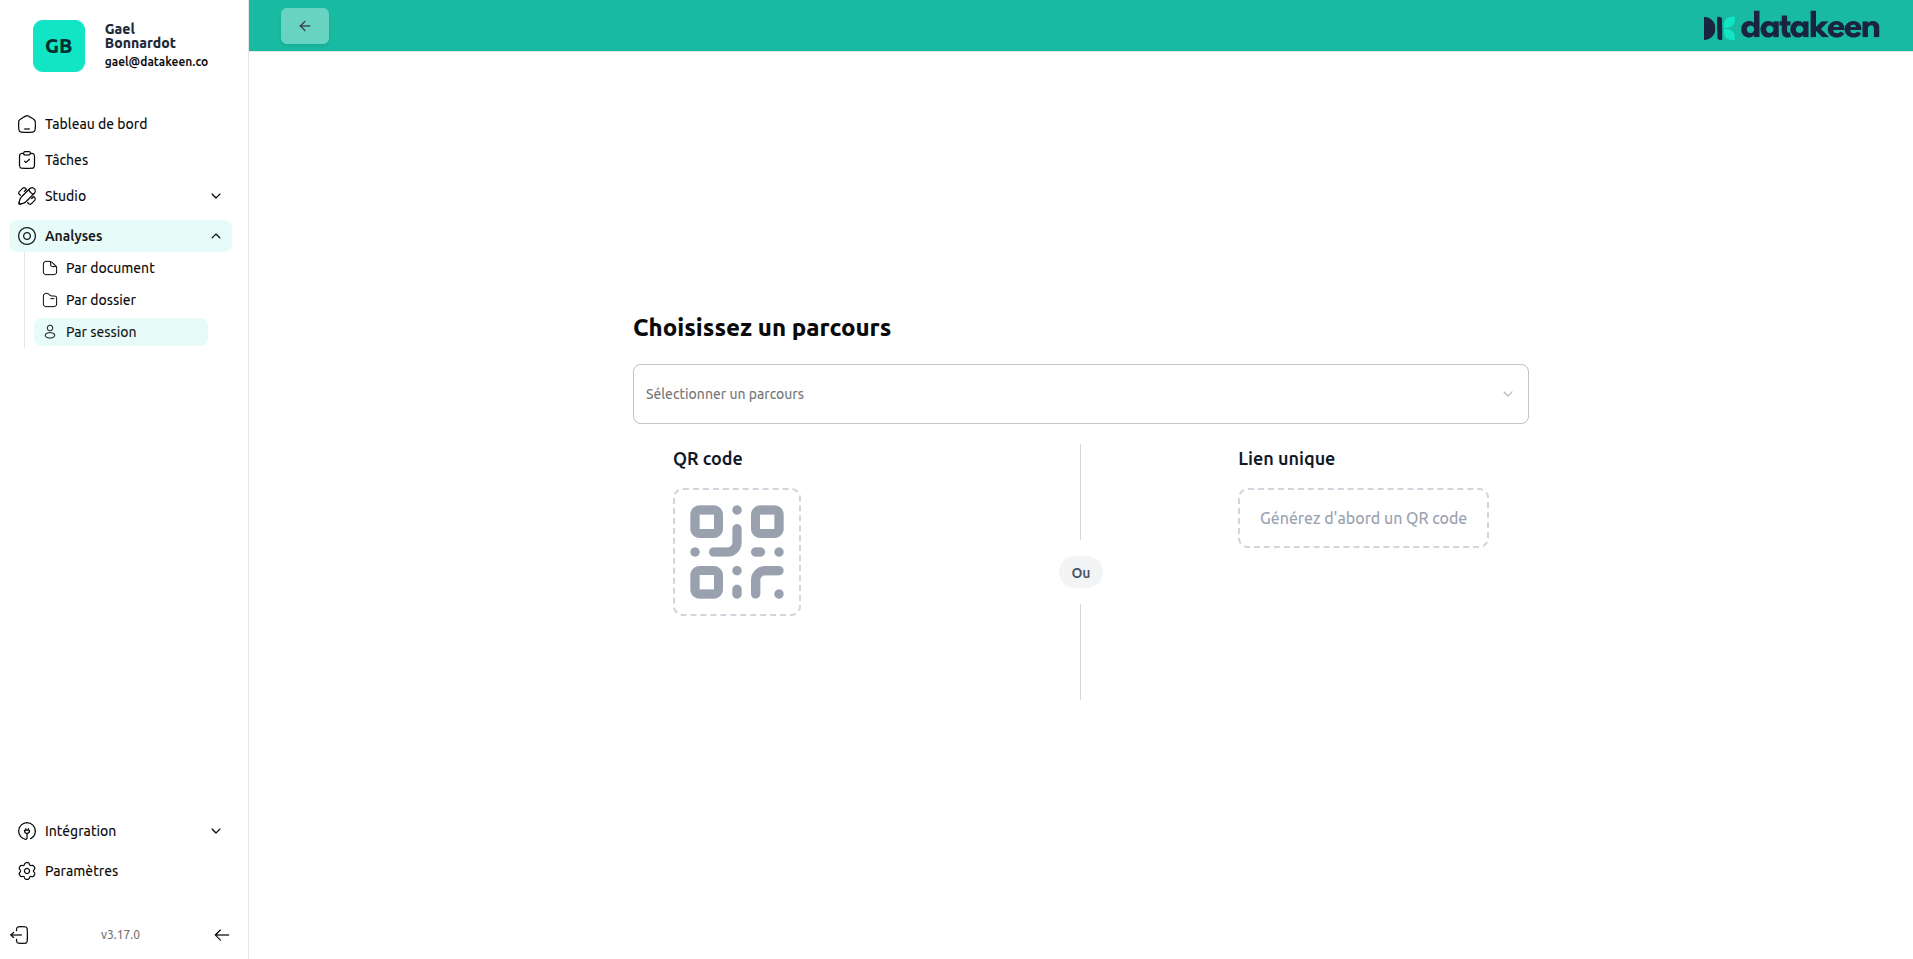
Once a journey is selected, a QR code and a unique link are generated automatically.
Sharing the session
Once created, you have several ways to get the session to your user:
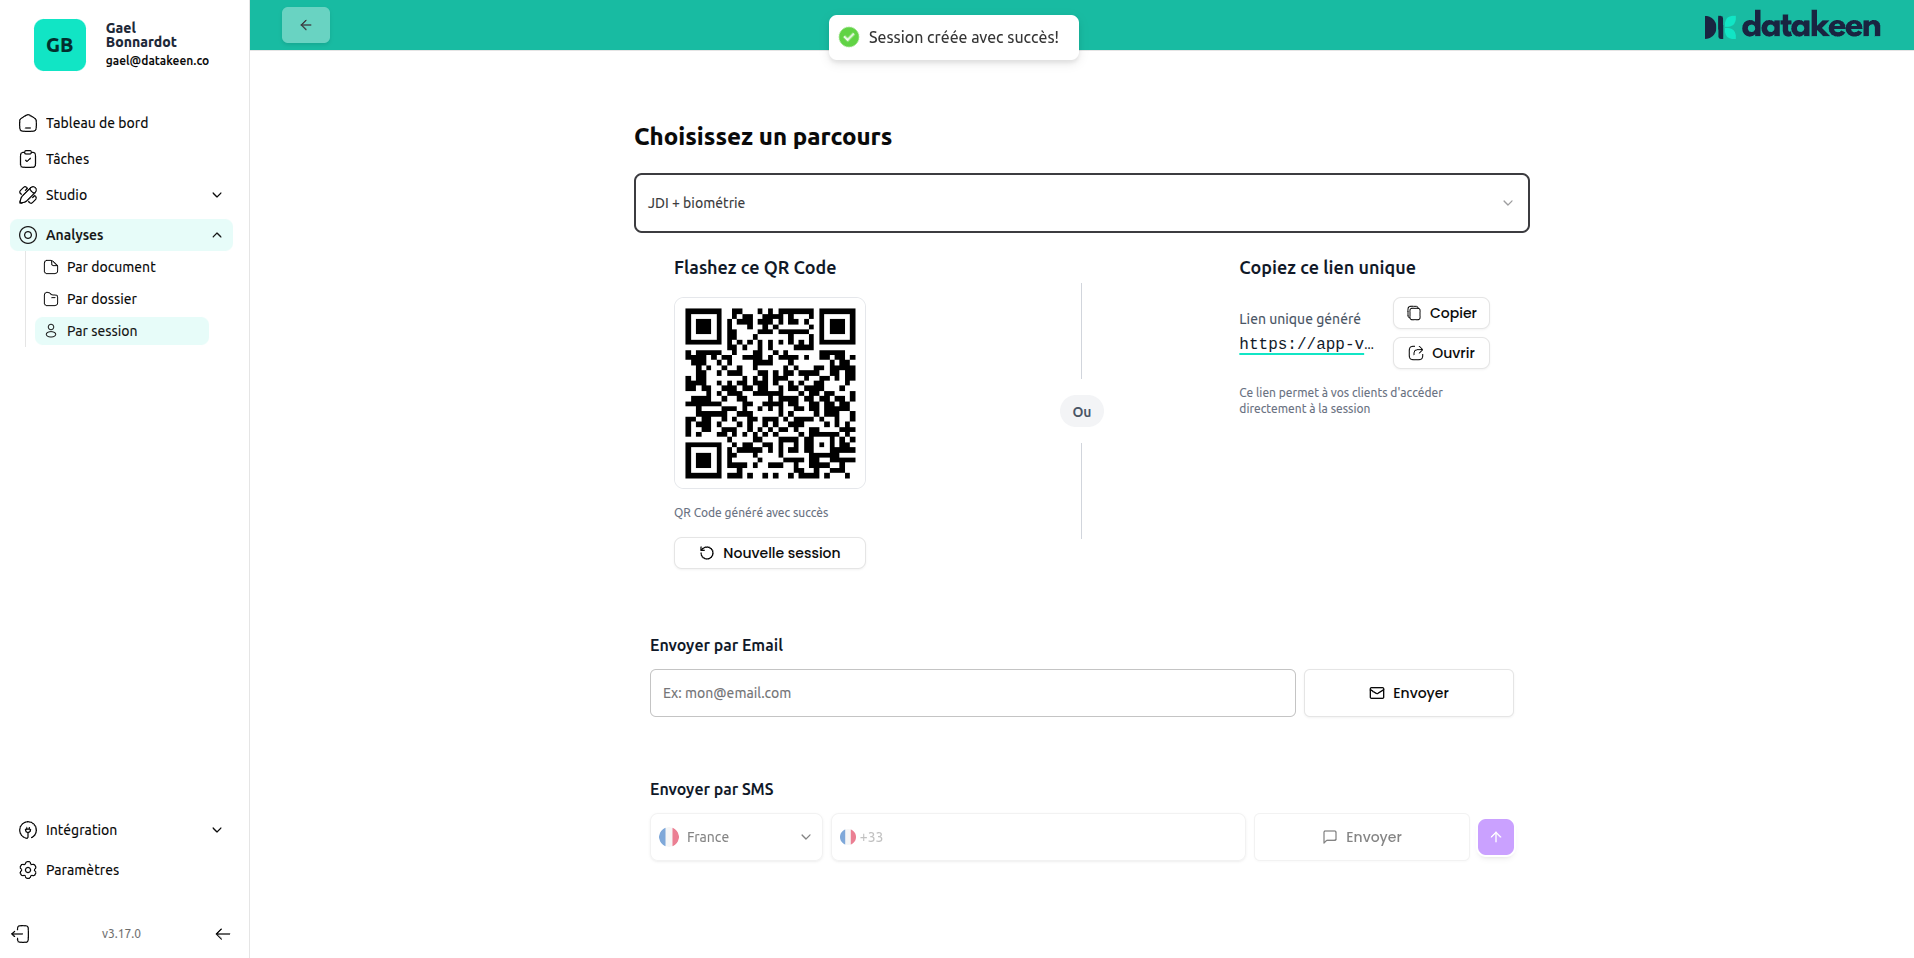
| Method | How it works |
|---|---|
| QR code | Display it on screen — the user scans it with their phone to open the journey |
| Copy link | Copy the unique URL and share it however you like (chat, email, etc.) |
| Send by Email | Enter an email address and Datakeen sends the link directly |
| Send by SMS | Enter a phone number and Datakeen sends the link by text message |
The "New session" button creates a fresh session for a new user on the same journey — useful when you're running multiple verifications back to back.
The session link is valid for the duration configured in your Advanced Settings. By default it expires after 24 hours.
Reviewing session results
Once a user completes the journey, the session results are immediately available in the back office. Click on any session in the By session list to open its detail view.
The detail view is organised into tabs:
| Tab | What it shows |
|---|---|
| Summary | AI analysis summary, flagged elements, and the analyst verdict |
| Form | Data entered by the user in form steps |
| [Document name] | One tab per document/step verified (e.g. ID card, biometrics) |
| Report | Full analysis report PDF |
| Audit Trail | Complete log of every action taken on this session |
| Tasks | Tasks assigned to this session |
| AML Screening | Anti-money laundering / sanctions screening results |
Summary tab
The Summary tab gives you the full picture at a glance — AI verdict, flagged elements, and extracted data — along with a panel on the right listing every document and step in the session.
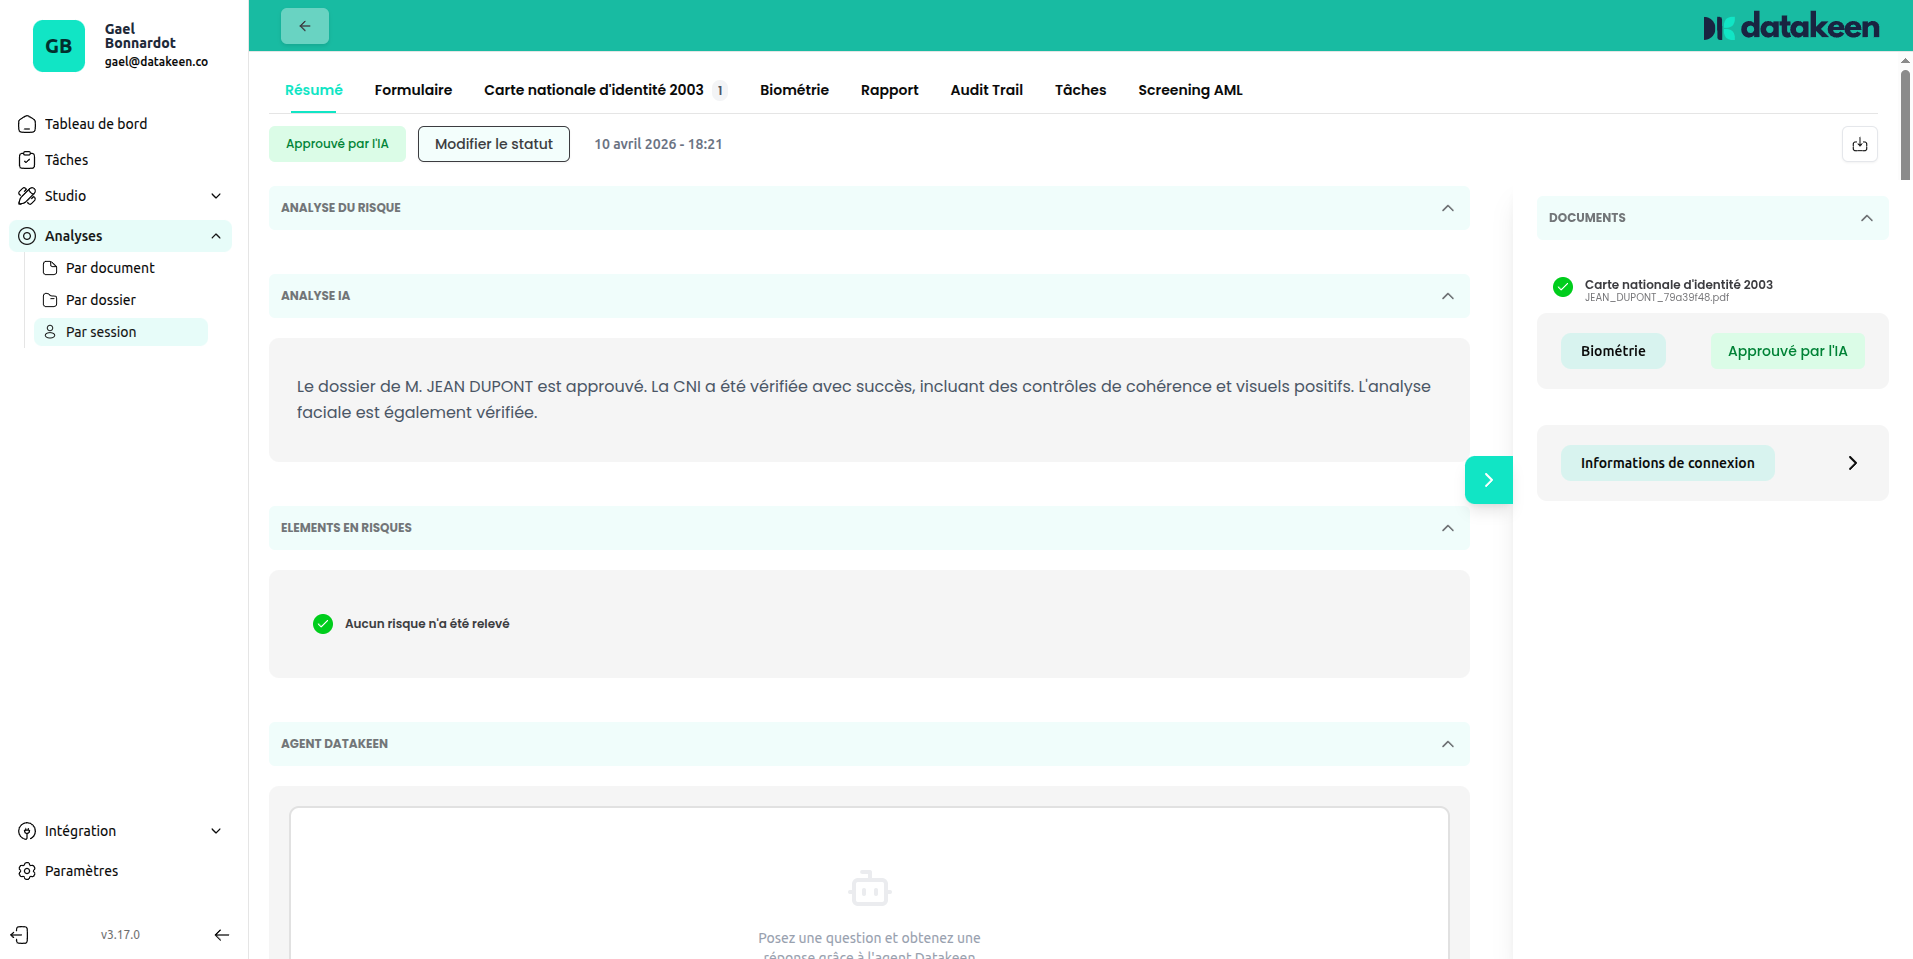
Key sections:
- AI Analysis — The overall AI verdict (Approved / Rejected / To review) with a summary explanation
- AI Analysis (detail) — A narrative description of what the AI found across all verification steps
- Sensitive elements — Any flags raised during the session (fraud indicators, PEP matches, AML alerts)
- Datakeen Agent — Space for your analyst to add a manual note or decision
The right panel lists every document checked, with its individual result (Approved / Rejected).
Changing the status
As an analyst, you can override the AI verdict or confirm it by clicking "Change status" at the top of the session.
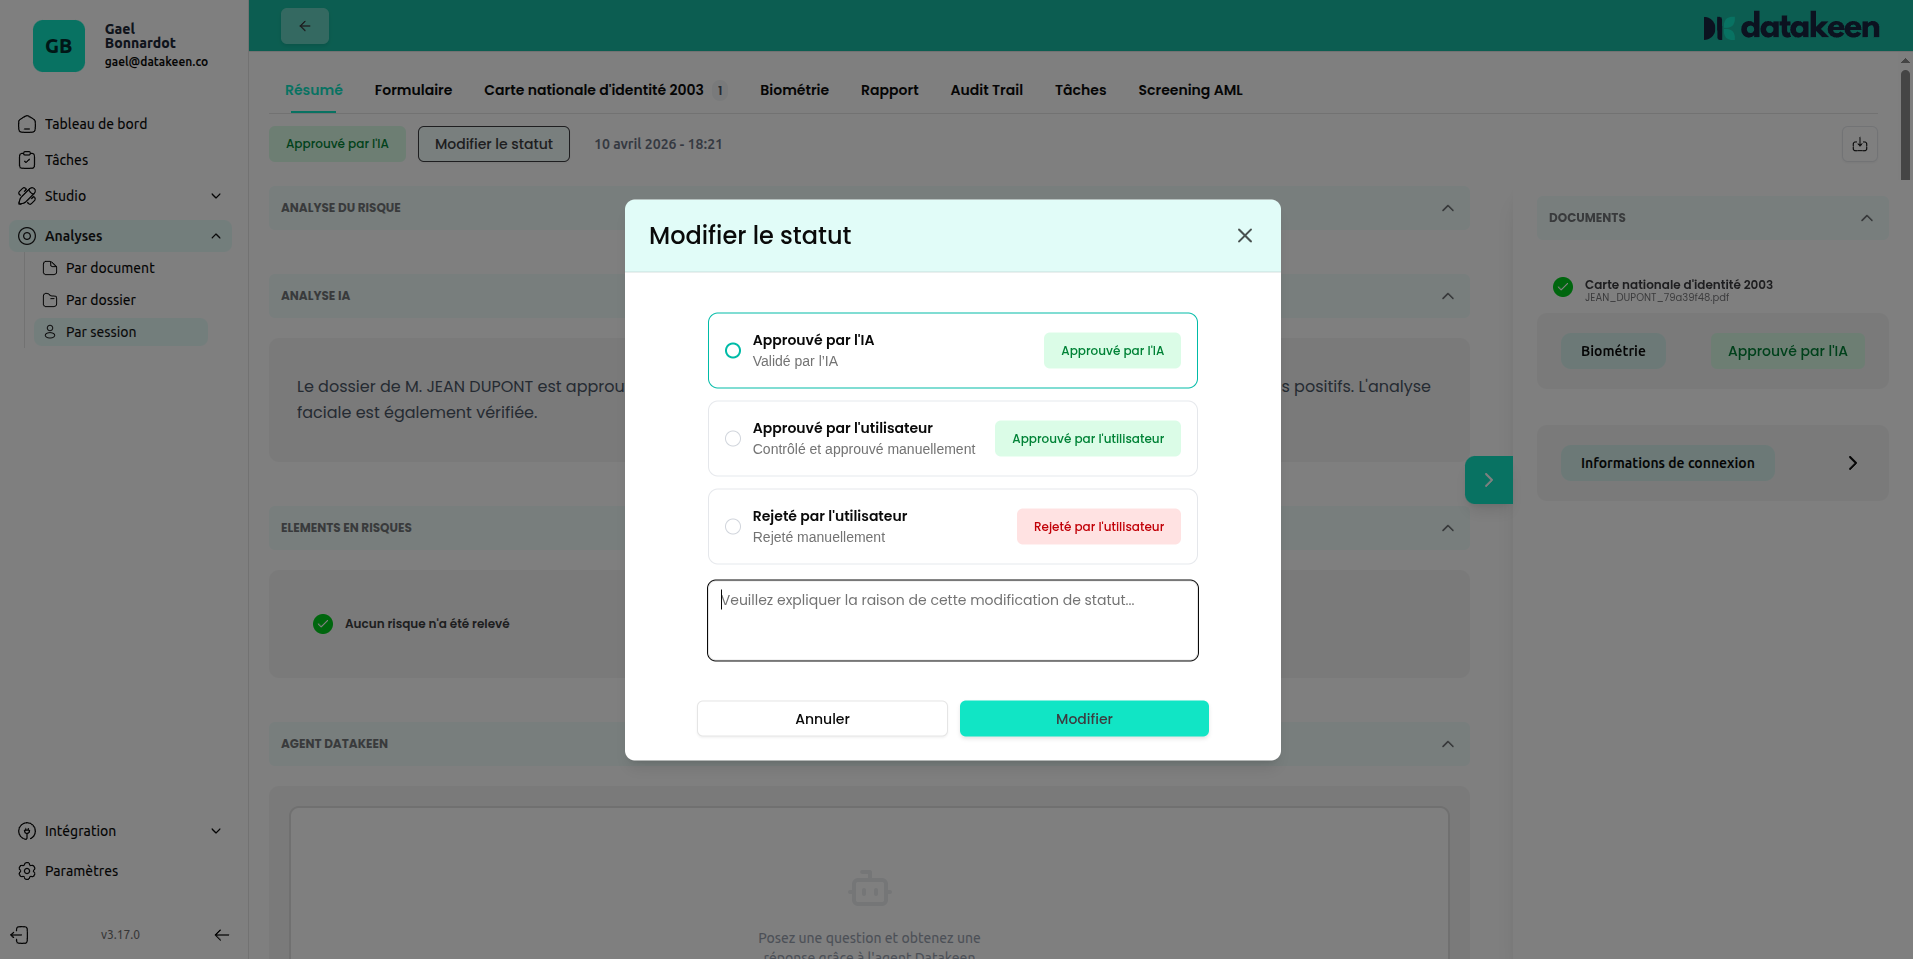
| Option | When to use it |
|---|---|
| Approved by AI | The AI approved it — confirm if you agree |
| Approved by user | You've reviewed it manually and approve |
| Rejected by user | You've reviewed it manually and reject it |
You can (and should) add a reason in the text field — this gets recorded in the Audit Trail and is visible to the rest of your team.
The webhook configured in Advanced Settings fires when you change a status, so your downstream systems are notified automatically.
Report tab
The Report tab shows a downloadable PDF summary of the full verification. This report includes the AI results, extracted identity data, and the final decision.
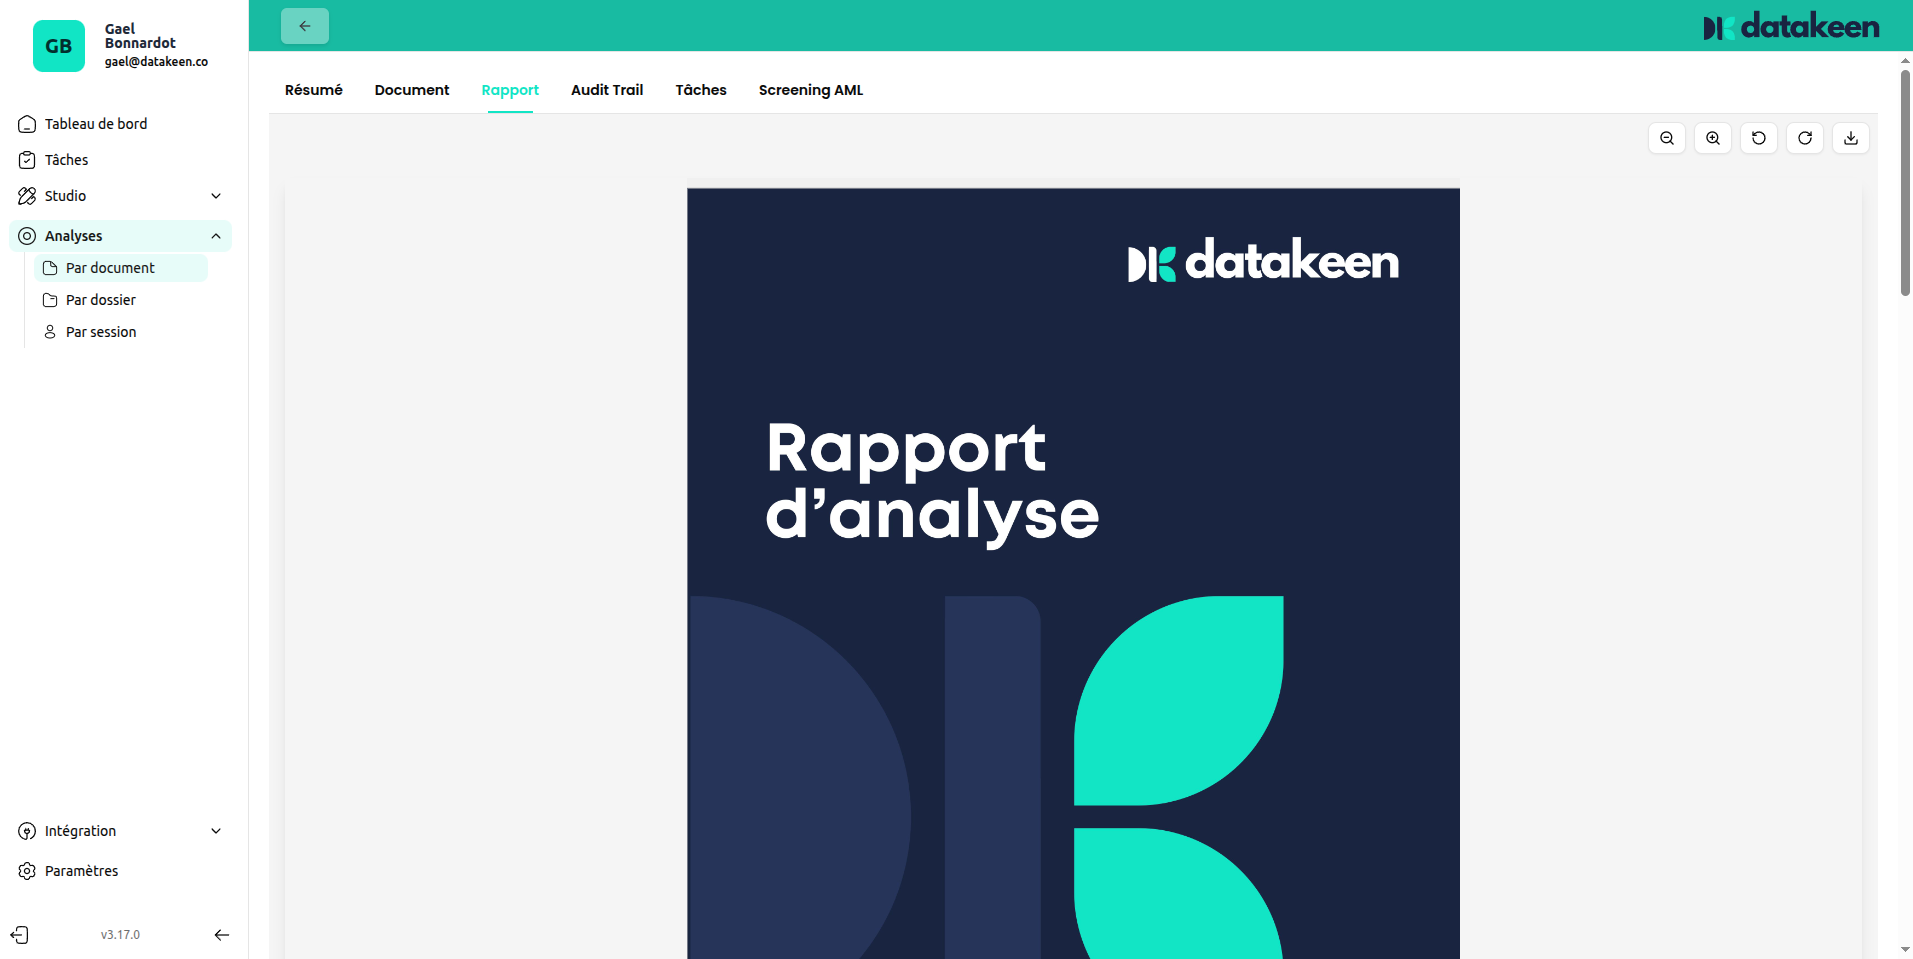
Use the toolbar above the PDF to zoom, rotate, download or print the report.
AML Screening tab
The AML Screening tab shows the results of the anti-money laundering and sanctions screening run against the identity data collected in the session.
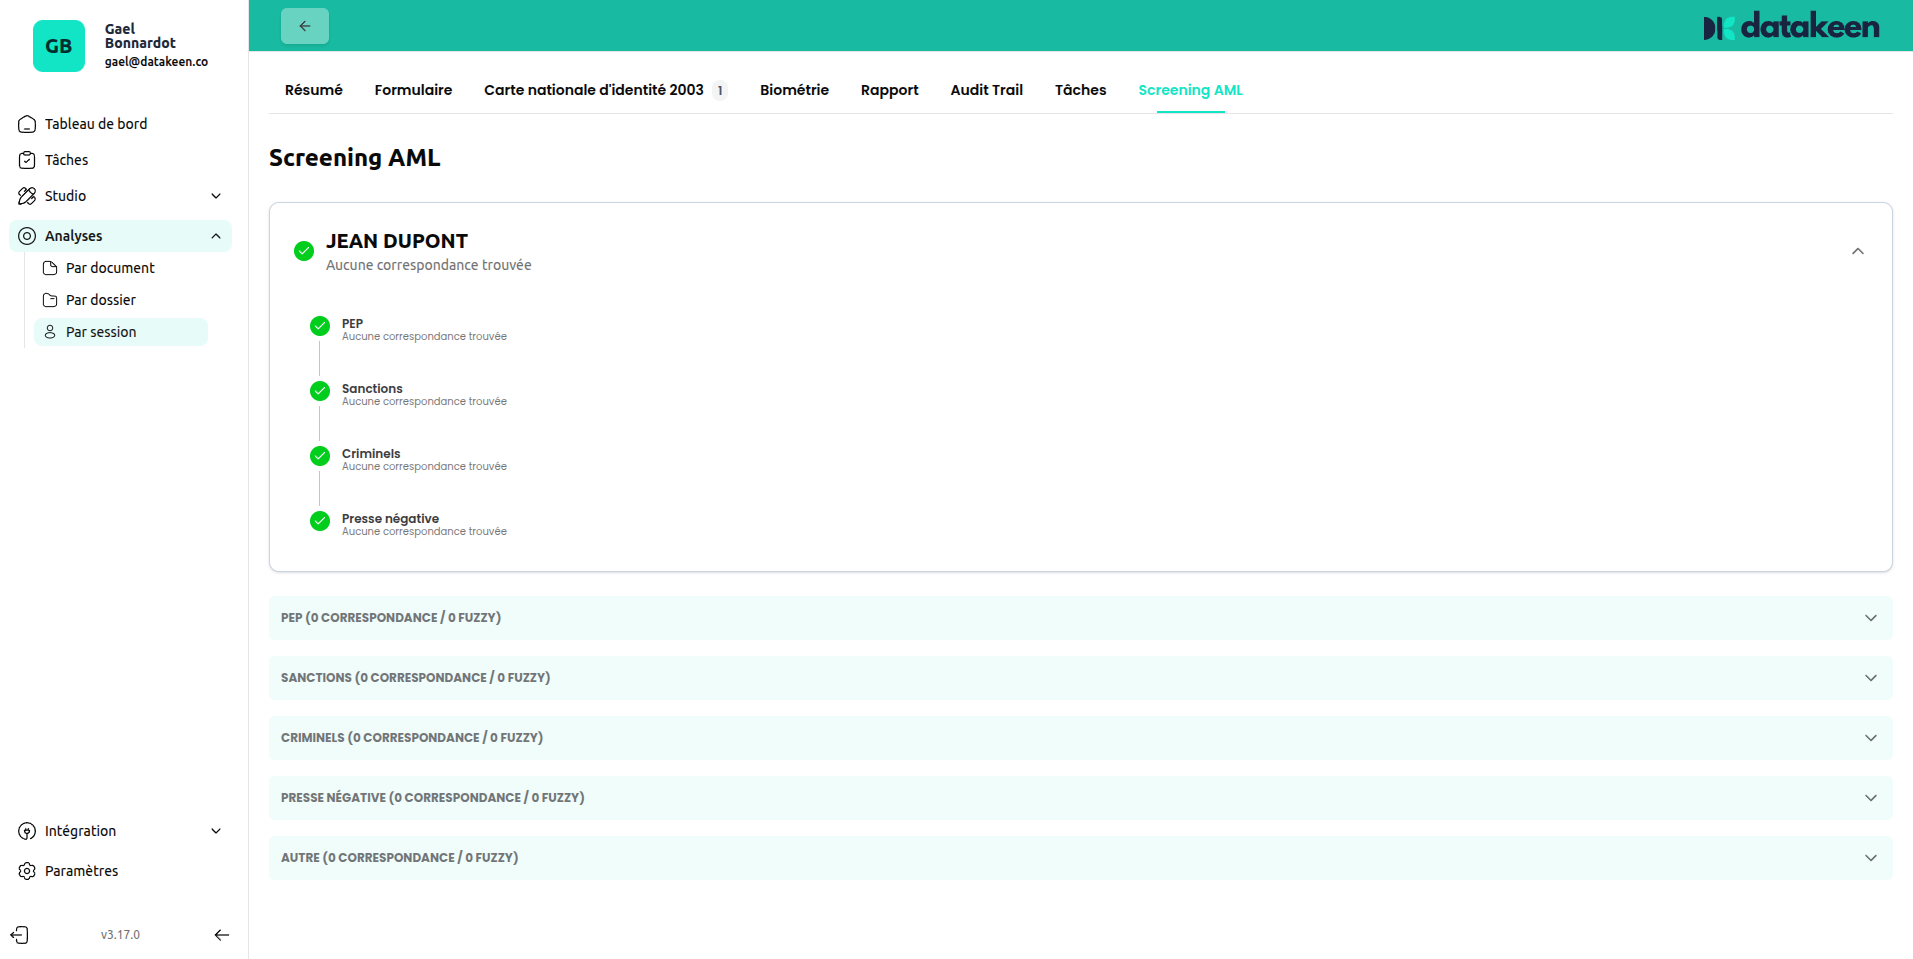
The screening checks the person's name against multiple lists and databases:
| Category | What is checked |
|---|---|
| PEP | Politically Exposed Persons |
| Sanctions | International sanctions lists (EU, UN, OFAC…) |
| Criminal records | Criminal records databases |
| Adverse media | Negative press and adverse media |
| Other | Other risk categories |
Each category shows how many matches were found. Click on a category to expand the results and see the individual matches, including their source and relevance score.
A green result across all categories means no matches were found. Any flag should be reviewed manually before approving the session.
Updated 2 days ago